Monday 31 August 2015

Yippeee its Autumn Winter Mini day

I have a few pictures to share before you go haring off to see the new catalogue

I have to admit I didn't think that Stampin' Up! could beat their last Mini catalogue, but how wrong was I, I think there is only 2 things I don't want in the new catalogue and to be honest  I've almost changed my mind about one of them, but it is all so lovely


I had so much fun making these beautiful Christmas tags, in the "Oh, What Fun tag kit" and love the "Oh. What fun stamp set that goes with it, So much so that I am inspired to make loads more posh tags , so look forward to seeing a whole range of tags using the Stamp Set with other Christmas papers and stamp sets.


So to the Christmas wreath I love the noise this makes , it rustles , so I am really tempted to hang it where it might get a breeze, the kit version has all green trees and is very contemporary, but as my house is Victorian I decided to use one of the trees from the Peaceful Pines stamp set as well . I think this looks more suited to my shabby victorian town house,
Oh but is it a Christmas wreath, or is it the "Season to Season Wreath" kit

Amazing how different it looks with burlap ribbon ( I must learn how to tie burlap bows,) and Autumn colours. But whats this?


I think that I had most fun playing with the halloween one. I just couldn't resist colouring some small basic rhinestones red and giving the bats eyes, and adding an extra boo sticking out from behind the banner and adding a spider dangler on Window sheet tamped in Stazon.

I have plans for the wreath, I wil be doing a few more versions of this over the coming weeks, including another Winter one and a spring and a summer one. I wuld also like to do a babys bedroom one too. So keep your eyes peeled BOO!

So you can hare off now, to see the new catalogue here  or Shop products now!


Sunday 30 August 2015

Posh Tags this Christmas

Finally had a bit of time to get one of my Pre-order kits out and have a play. The "Oh, What Fun" Christmas Tag kit and "Oh. What fun" Stamp set.

Christmas is never going to be the same, Not only did I really love making these tags, but I really want to carry on making this style of Tag, I have so many ideas buzzing around in my head that its so exciting. So keep an eye out for some really cute Christmas tag ideas in the near future.

So here is the picture


So did I do the kit exactly as instructions. No and I will give you a quick tip. Stamp the to and from on the back of all your tags before you start,

The occasional tag design was just a little to plain fro my tastes so any you see with inked edges, thats my addition. The Oh What fun tag original design had the lace just peeping out from beneath the banner.  I love that lace so much that its a bit like the film Dirty Dancing for me. Nobody hides Lacey in a corner, So I ruffled the lace and had most of it showing.

The  Merry Wishes tag The greeting and line were originally both red and the No peeking tag was stamped all in Mint Macaron, I also cut up the left over gold glitter card and added strips to the no peeking. But thats it, I didn't use any other Stamps or items not already recomended by the kit,

I love these so much that I am definatly going to be doing some of my own, versions with other Stampin' Up! stamp sets and have loads of ideas already.

So peeps thats todays short and sweet post,

Catch ya laters.
Tracey

Autumn Winter holiday Mini catalogue sneak peek

Morning Peeps

So a couple of things I want to say

Sorry


Still no YouTube video, I have really struggled with making my 1st YouTube video, mostly due to rubbish equipment.  After about 5 days attempting to make the begginers  video. I will admit to getting so demoralised that I thought. Why would anybody want to watch my videos anyway?  What do I have to offer? There are so many amazing crafters on YouTube why would people want to see mine?

Fortunately this was on Tuesday and on Wednesday we had a team meeting at my friends and Uplines house, as I had not been able to go for a few months I was really looking forward to spending the day with other  crafters all of whom I consider to be really talented.

1st Sneek Peak from the Autumn Winter Mini Catalogue, Thankful Forest Friends Stamp set


I had arrived a bit early, and then the 1st of the other crafters arrived and I was really moved when she said, "oh ' you are here, I am so pleased, we have really missed your ideas'. after two more similar greetings  I came to the conclusion that actually I may not be the most perfect crafter, but I do have something to offer. I have been out and bought a new camera and you will be getting YouTube videos after all. It also goes to prove that after 20 years of crafting. I still feel I have loads to learn. I think that's one of the reasons why I love crafting so much. Everyday I can try something new.

Now to the sneak peek


This must be one of the most striking products in the new catalogue and I just fell in love with it as did my sister,

Stampin' Up! Witching Decor Project Kit
 Not exactly as instructions, extra leaves were available in the kit, so some of them were added, Each one stamped on both sides and inked on all the edges then crushed and crinckled, There was some extra burlap bits so they were taken and made into little bows which were scattered through the leaves.
Detail from Witching Decor Project kit with extra touches.


So happy with how this turned out, you will need various stamp sets as well as the kit Witches Night, also in the New Catalogue and this provides the Labels and cobwebs stamped on the base plus Acorny Hello also will be in the new catalogue and the Vintage leaves stamp set. Available now. If you need just like these for a project you can make your own with the "Leaflets Die set and Vntage leaves stamp set stamping on the back of the leaves needs careful positioning of the stamp but well worth it if you need really realistic leaves for a 3d project.

Built for Free Using: My Stampin Blog

Sunday 16 August 2015

Sorry to everyone

I have spent the last 3 days trying to teach myself to produce my own tutorial videos for YouTube so that I can give you video tutorials. I thought I had everything sorted. However despite having 5 lights I cannot get the lighting right, but I persevered and have made 10 attempts today to film my beginners tutorials, and my Big up the bucket tutorial, everything that could go wrong has. It's now 9pm and I am a bit demoralised, that I cannot give you the tutorials yet.

The camera I bought has the battery life of about 1 hour and does not warn you when it's going off. I have also been disturbed by 3 callers phone call and cats.

Oh well tommorow is another day. I promise that the tutorials when they arrive will be worth it.

Tooodle pips for today peeps.

Friday 14 August 2015

Big Up the Gift Bag Punch Board Bucket or pail

So here it is the much bigger bucket or pail


So I attempted to make a bigger version of the pail or bucket to see if my idea would work. It didn't at 1st but after a few attempts I cracked it. Now I was going to do a lovely Youtube video today showing all the steps to make any circular box, bucket etc really easily.

However I am having difficulties getting the lighting right in my video so I am afraid, full instructions maybe a couple of days away,

But once I've cracked the filming I will also soon be showing you, loads of great tutorials and ideas, Including how to turn this poundshop plastic frame


 Into this lovely sea themed frame

I took that photo in't it cute, Dolphin and calf
So if you would like to know more please come back and check , once I have the video sorted I will upload it.

ToodlePips Stunners 

Thursday 13 August 2015

A fantastic day and sneak peek of tommorows post

A great Stampin' Up! day 

Yesterday was an amazingly good day, I had a lovely morning with some of my Northwich Stampin' Stunners. They made versions of the Gift bag punch board bucket and went away with some of last seasons papers for free. They had a great time as there were only 3 so I had time to share some extra tips and techniques as well,

So here are my lovely ladies Ann, Marjorie and Christine, with their gift bag punch board pails. In last seasons papers.

Regular Craft class in , Northwich, Cheshire, Gift bag punch board Pail

If you are wondering about the forks we used them to tie tiny bows. We have 3 hours and I try to get projects finished within the 2nd hour , so ladies have a chance to look through samples or play with some of the other goodies I bring along for them to try,  So here are a couple of pics to give you an idea of what they got to see and use.


Cherry on top paper stack and card-Watercolor wings stamp set-Butterfly thinlits dies-Mini treat  bag thinlits-All Stampin' Up!-Available online 24/7- www Stamp and Scrap UK-


Built for Free Using: My Stampin Blog


Stampin' Up!- Watercolour Wishes- Card kit-great-for beginners- Available from Stamp and Scrap UK-01270 215625
Watercolor wishes Card kit,
My sister and I both had this kit and we had great fun making them together, It was so easy just to take the box to her house, o scissors or adhesives required everythings in the box. I deal for packing in your holiday case. Super Simple for beginners too!
Stampin' Up! stamp sets- Cardmaking class- craft class-northwich

So after I returned home. I decided to play around with my gift bag punch board as I had another idea at the class. Which I will share with you tommorow, but here is a  sneaky peak.

Tommorows post, Biggin Up! the gift bag punch board
You are so going to want to catch tommows post, I was so excited when I realised my idea would work, its going to mean that tommorow I will be trying some interesting things to see if they will work as well.

Remember you can ask me about any craft issues you may be having , contact me through contact form or phone me between 9 am and 8pm on 07963 459737

Toodaloo and catch you later!


Tuesday 11 August 2015

Stampin' Up! Timeless Elegance DSP, Gift bag punch board Pail or What Else can I do with my Gift bag punch board?

I have really enjoyed the Gift bag punch board so far and have decided that I will share this cute idea for giving away seeds from your garden, or giving a gardening gift card , or just giving anything cos its so cute,  So here it is , my pail and its going to be this months Hostess gift, and the winners of this weeks Beginners class tips challenge  See here for challenge details will receive one too.

Gift Bag punch board  Pail  Stampin' Up! Timeless elegance DSP Copywrite Tracey Allen Stamp and Scrap Uk
Timeless Elegance paper and the gift bag punch board Pail

and here is  the handle detail

Gift Bag punch board  Pail  Stampin' Up! Timeless elegance DSP Copywrite Tracey Allen Stamp and Scrap Uk Handle detail

So we will start with the instructions to make this cute pail with the Gift Bag Punch Board. Instructions written so a complete novice can make this, so they look a little long. But they take no time to make,

All supplies listed below instructions

Gift Bag Punch Board Timeless Elegance Pail Tutorial


Cardstock and Paper
4 1/2 by 10 1/4 inch piece of Timeless Elegance DSP

Watermelon Wonder cardstock
1/2 by 10 1/4 inch strip
1/4 inch by 8 1.2 strip
2 x 1 3/4 circles .
2 x small hearts ( Itty Bitty accents punch)


1 If using Ink pads Give the Water colour pad a squeeze before opening, then  you will see ink in the lid squeeze a little water just next to it and then mix some of the ink into the water. or if using the markers scribble some ink onto an acrylic block then treat the same as using the pad), Take your Timless DSP  give the roses a light wash all over, then add extra colour where the roses are darker, Colour until you are happy.,

2 Colour the smaller flowers with Delightful dijon mixing in a little Watermelon Wonder for flower centers and the leaves with Cucumber crush (only do a light wash on the leaves,) Leave to dry for about 5 mins

3 Take the Gift bag punch board and along the long side of your paper line up the edge with the white line and  punch,  Then line edge up with the left edge of the punch and punch.

4 Then line up the edge of the punch with the center of the dip created by punching, repeat this until you have 12 points. Cut off any excess level with the point not the dip (if you don[t get it spot on center with your punch it can be a little different so I have given some room in measurements for this).

5 Place tape along one inside edge (not roses side)  of the paper and then place tape on the outside of the other side from the middle of the 1st point to the top ( in a straight line)  remove tape backing. Line up the points with one another and once you have them perfectly  aligned adhere the points together,  go to top and make sure top edge is straight, once it is adhere, then run fingers along seam.

6 Place tape along 1/2 inch strip and then place around top edge , starting just over the seam, When you get back to the seam, trim level with seam.

7 Gently bend points towards the center, when all leaning in turn over and gently press down , points will find their own position. Either with tape of glue (whatever you are happiest) with cover one side of one of the circles with adhesive. Place this inside the pail in the center whilst gently holding pail flat against work surface, press circle down with handle end of piercing tool.

8 Turn pail over, some of the points may still be loose, Cover second circle with adhesive and adher to the bottom in the center.

9 Take the 1/4 inch strip of cardstock and adhere a heart centered on each end with the card coming as far down the heart as possible without showing on the other side. I used two way glue pen for this, With piercing tool on piercing mat piece a hole in center of each heart.

10  With seam at back gently pinch pail from the seam and the front, this will help you see where to position handles . Place one end of the handle on one side just over lapping the bottom of the cardstock band. Pierce through center of heart and attach with a brad,, repeat on the other side,

Gift Bag punch board Timeless elegance seed packet tutorial


Gift bag punch board Timeless Elegance Stake your Claim Seed packet tutorial
Gift bag punch board Timeless Elegance Stake your Claim Seed packet 
Cardstock and Paper

7 by 7 inch piece of Timeless Elegance DSP
Scrap of very Vanilla cardstock

1 With pattern direction the right way up place into gift bag punch board, position edge on white line score along top and on the side mark, then align pointer with seam and punch. Score across top and on small mark. align score with pointer punch and score across top.

2 Turn to opposite edge and punch on all the score lines.

3 Trim off outer flaps top and bottom level with base of score line. Using aqua painter colour background with a very very light wash of Watermelon Wonder, Then colour flowers with a darker wash leaves with light Cucumber crush, and small flowers with Delightul dijon, Centre of flowers with a mix of Watermelon wonder and Delightful dijon,

4 Now depending on your preference you can have No seam on front of envelope a center seam or a side seam. Fold short side in and then make a mark where you want seam and trim off, place tape along right side of small flap and on the back of trimmed flap, remove tape fold small flap in and then adhere trimmed flap over the top. (If you want to use this as a gift card holder squeeze the edges of the envelope and insert 1/2 inch punch into the top gap ( with punch bottom visible to you center on the envelope and punch half a circle. , Now adhere bottom flap.

5  With Watermelon wonder pen colour stamp going across the top of stake and down the stem of the stake, You want to get it thicker in some places and thinner in others ( to look like wood) If using ink pad, ink and then drag Aqua painter gently across top and down bottom Stamp on very vanilla.  If you do not have framlits or if you don't want an edge on your stakes tamp another stake. (I didn't want the edge on this project)

6 Cut out both with scissors or the stamped one and a plain one with your bigshot machine and  framlits,  adhere together tie a piece of Whisper white baker's twine around stake and make a tiny bow. Trim ends, Then close flap on envelope position your stake over flap at an angle and so about half of it in total covers the flap make a tiny pencil mark on each edge where  flap meets the stake, turn over and place two way glue pen adhesive to just below  those marks, You do not want any to get above those marks

7 Adhere the stake in position.


Price: £15.50
Built for Free Using:  My Stampin Blog


So tommorow I will be showing you two more Gift bag punch board ideas, which will be part of my Gift bag punch board class in the post kit

Byeeee for now

Monday 10 August 2015

Beginners Stamp Classes, Class 1 Grunge and the basics, and What to do when everything goes wrong!

So you are either here because, you're a fairly new stamper, or you liked the look of the Class samples or hated the look of the craft samples , or you've just stumbled on this post and are wondering if its for you.

 Beginners Stamping Tips, Stampin' Up!


If you have not read this post Want to Stamp but don't know how (Shortened title) I suggest you read it before continuing as it explains everything you need to know about the classes and Challenge,

Hi  fairly New stamper,  it dosn't seem so long ago I was just like you, so please don't be intimidated I promise you that you can do this, and if you stick with me for the 2 months, at the end you will know more than many stampers who have been stamping for years! If you just stick with me for the first class you will have a lot more confidence than you did, and you will know more than you did.

Hi fellow Experienced crafter, glad you liked my samples, or sorry you didn't  There is a reason I picked grunge style cards so hang around you may find out something you didn't know. I know I am still learning everyday.

Hi Entrepid adventurer, it may be a new world to you, but like most new things, it can be exciting, scary, mind boggling (Why would anybody do that!), Just give me this post to show you what stamping can do for you, and how easy it can be !

So tips for beginners this week (will be downloadable at the end of the week)

I apologise in advance for the length of this post but I really wanted you to get as many tips as quickly as possible.

My 1st tip for beginners is please do not compare your first few cards with cards on pinterest , Instagram and facebook, people usually only put their successes on their pages, They do not put on their failures. Trust me we all have failures, I still occasionally smudge my stamping, drop the pad on the card, miss stamp, make design mistakes, What some crafters won't tell you is that some of their mistakes forced the vital change that turned the card into a cracker.

So what to do when stamping goes horribly wrong?
or
Stamping Mistake, then Turn over a new leaf, Draw a line round it, Stamp it out, Cover it up, Go for the grunge , Make a splash, or just Cut it out, literally

 Its only paper, its not the end of the world, That's also why paper was made with two sides, Turn over a new leaf, just flip it and try again. (for double sided patterned paper make a different card) For single sided paper screw it up really tight, then unscrew and flatten out. Use it as a crinkly background,

 Draw a line round it, otherwise known as why squiggly lines are popular with crafters,

Notebook  1


Drawing a line round it will solve a load of issues.

Drawing a line to hide marks or unstraight edges.

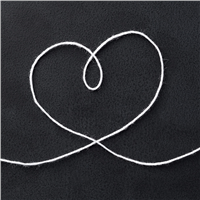
 If you make a tiny mark on the edge of a card or of a stamped image, take a black fine line marker draw a squiggly line starting at the point the mark is and go all the way round the card, or do two more squiggly lines on the same edge and use it as a border. Or if mark is really small you can do fake stitching just do small dashes along the edges of the card. (Notebook 2 small heart)

If you have stamped a border and it doesn't quite line up, or if you have added your focal point a tiny bit off line, Squiggly lines are your best friend and can make it look like its straight, Just squiggling a line around it makes it a lot less visible, if its still noticeable squiggle a second line going in and out of the first line.
Notebook 2
On both notebooks I specifically didn't try to line the word pieces up that well, to ensure that I had something to fix, I did 2 things squiggled round them then took the same colour marker and filled in any obvious gaps.On notebook 1 I used really squiggly  lines to round the edges, on notebook 2 I I used fairly straight squiggly lines!

On the tree card, when you catch the edge of the stamp and leave an ink mark around a greeting. You can draw a couple of squiggly lines round the greeting, and then using light grey ( I mixed night o navy, cherry, cobbler and always artichoke marker on block o get the grey. I then added lots of water) with aqua marker ad a wiggly painted line down one side and either top or bottom edge to create a shadow.


Using lines to make your focal point pop!

If you find that your focal point doesn't visibly pop off the matting layer (show up that well).  Draw a line round it. you can do short squiggle with a dot followed by short squiggle`eg. keeping squiggles approx same length or a normal squiggle line or an intertwined double squiggle or fake stitching either straight or do tiny crosses for fake cross stitch

Drawing around anything with a black line either straight or squiggled gives it more definition.

Stampin' Up!-Sheltering Tree-Whats your Type-Tracey Allen-Stamp and Scrap- UK
Tree Card


Using lines to help with handwritten greetings

Also if you don't own the right greeting stamp, choose a grunge style card or a naive style like the boat card and you can get away with doing it by hand, even if your writing is pants like mine
.
If you want it straight use a pencil and ruler to add a light line where you want the greeting. Count number of letters and spaces in each line. Measure your line, On a piece of paper draw a copy line. Divide the length of your line by the number of letters and spaces you have.  Mark sections for each letter and space .

In non joined up writing enter each letter and space into each section. Now with your fine line marker you can draw lines that follow your letter starting really close, you can angle these to get different results (Just have a little practise on some copy paper, starting with your hand writing and seeing how any different look you can get , using straight or squiggly lines. See which ones you like. Those will be your go to options when you need a greeting you don't own) when you are happy , copy this onto your card! Oh don't forget to rub out the pencil lines!

Oh finally is a dot a small line, you can add  1 dot on each point on a letter (works well on caps) for one look and if you add 5 small coloured dots around each dot you have flowers on each point.
(Take note this weeks challenge is best handwritten (with lines and or dots)  greeting on a card or on a piece of paper for those just beginning, the weekly winner will get a little git in the post and all entrants at the end of the month will be in a draw for 1 of 2 £20 voucher )

I think that's enough on lines for today,

Stamp it out!

This is really easy, have you got a stamp that you can stamp over it, Can you change the position of your stamped greeting to cover it, not sure if it will look OK with the stamp you have chosen to cover it. Stamp it on the Stamp-a-ma-gig sheet position over mark, if it looks great do it, if not try something else.

On the boat card. First admission of the week, I really dropped my acrylic block with marker on it on the edge of the card leaving a big night of navy blob, It was going to just have white background and doodled borders.

 So what did I do. I took the small rectangle from "Whats my Line" Cut a piece of copier paper 1/2 inch smaller than my card. and centred it over my card and held it in place on one side . Then stamped in night of navy with the rectangle randomly around the edge, I didn't want a solid night of navy border so I stamped turning the block, and wasn't too worried if it wasn't pressed hard enough to get a full impression. I re stamped in places I thought there was too much white. I think this works really well on this card.

Stampin' Up! Whats your type Stamp set, Stamp and Scrap Uk Beginners Class 1 Grunge and the basics, or What to do when it all goes wrong

Cover it up!

Can you add ribbon, washi tape, or an embellishment !  If you have smudged your greeting. Cut a panel about 1/4 inch bigger than your greeting. stamp greeting onto it, add a line border  and adhere it over the top!
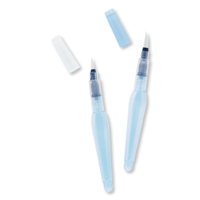
Make a splash!

Take inks or markers n the same colours as your card.  With Aqua-painter pick up some of the colour on the brush then tap your finger on it while holding it over card , this will create splashes, do it in 2 or three colours if mark is still showing as a mark. Mix more water with the ink and flick the brush over the card to get bigger marks.

Go for the grunge!

If you are a beginner and all of these things are happening. Grunge style is amazingly forgiving, for new stampers. Its meant to look grungy and distressed. So if you make a mistake on a card, just add all of the above and Grunge it UP!

Just cut it out!

So you may have noticed that  that the panels in notebooks one and two don't match, that's because when I stamped Notes I was slightly off track, So I just cut it down till it was straight. Easy to do with a trimmer. Which I will explain in the class notes. So you can also cut your focal point into a panel and make a separate panel for your greeting.

WHAT YOU WILL GET IN THE CLASS NOTES

Basics

All of the above with example photos before after !


Making your own basic card blanks and envelopes
Basic stamping Wood, Clear and Photopolymer
Basic watercolouring techniques
Line drawing examples step by step
Text writing examples step by step

Project Class

Take a Note Notepad instructions inc how to cover any size notepad or post it notes
Boat card and Tree card full step by step instructions, and product list for each project.

Well those are my beginning tips, I hope you found it interesting. The basic class notes will be available on Sunday to download I will put download here, On Monday I will e mail out project notes to this weeks customers, I will also provide a download for the project notes for non customers. They will be £3.00

Please comment  below and tell me what stamping issues you have and I will cover then in the next two weeks. 

Also this weeks challenge
Create your own greeting using your own writing and lines and dots. Put a link below to your image and on Monday I will announce this weeks winner. Plus you will be entered into this months beginners class draw.


Want to stamp, but don't know how, or feel you are not very good? Then you need to follow this!

BEGINNERS STAMPING CLASSES
OR
20 PIECE CRAFTING KIT CHALLENGE!

1st  Class Grunge and the basics!  and  What to do when it all goes wrong!


One of the things that I really love doing is helping new crafters find their crafting mojo, and sharing hints and tips that help them achieve what they thought they couldn't. I wondered what was the best way to provide this on my blog.

So I have put together my essential 20 piece beginners crafting kit, and a free weekly beginners card making class.

In the first two months I am going to teach you

Basic Stamping
What to do when it all goes wrong!
Stamping styles Grunge, clean and simple, vintage etc.
Card design tips and tricks.
Various stamping techniques.
How to get more out of your stamping products.
Gift Packaging basics.
Help with colour selection.

The twenty item craft kit

I have put together this kit to enable anyone who has absolutely nothing to start with, to make a huge variety of projects for most if not all occasions. It will enable you to make  lots of different sized cards, cards with fun folds, interactive cards, gift packaging and home decor, that anyone would be happy to make.

As well as this kit, I will be using a ruler and pencil and eraser, fine line marker. low tack masking tape, copier paper. white tissue paper. old carrier bags, cereal boxes and some items to work with, tea lights, notebooks. post it notes etc.

Every week for the  next 8 weeks on  Mondays at 7pm . I will be posting 3 projects. I will provide two sets of class notes. The first set of notes will cover all the basics and techniques used in that class for example, Making any size card, creating matting layers, how to stamp, using the stamp-a-ma-gig etc. The second one will have instructions for the specific projects in that weeks class and will assume you have read that weeks basic and technique notes. On Sundays I will e mail the project notes to any customer who buys from my online shop that week. Anyone who spends £100 or more in  that month will get all the months class notes e mailed to them. (class notes will be available to buy as just a download at £3.00)

In the 1st month I will only be able to use the products in my kit and the extras above,

The second month  I will be able to replace cardstock and adhesives if needed I will also say whats been replaced.

So here is my suggested 20 piece crafting kit. For the absolute beginner with no stash at all. For everyone else   I will list products used for each of the projects and you can buy the ones that interest you! The class notes will have lots of stuff you can use with what you already have.
About the kit, all I can say is give "What's your type" stamp set a chance and it will surprise you!


Built for Free Using: My Stampin Blog


If the series of posts is popular I will continue it and each month I will  add £40 of new products that I feel most extends the versatility of what is already in the kit ( and top up cardstock )

The 1st Class post with tips will go live tonight and there will also be a linked challenge, where each month I will pick at random 2 entries and they will receive £20 of Stampin' Up! products of their choice.

So that's it for now my Stampin Stunners, catch you later!

Friday 7 August 2015

So who am I, and why would you want to know?


I'm Tracey Allen,

Why you would want to know who I am?  Well! I am an Indpendent Stampin' Up! demonstrator based in Cheshire, and I hope to become your crafting muse, adviser and wise old crafting aunt. I am going to share with you tips and techniques, project tutorials, reviews, free cutting files and digital papers, and I'm going to share my love of all things crafty and especially my love of Stampin' Up! and their amazing products!


If you haven't heard of Stampin' Up! you are probably just starting your journey into creativity, and I would be really happy to be your introduction to some of the best crafting products in the world.


Built for Free Using: My Stampin Blog

Stampin' Up! provide versatile and beautiful stamps of excellent quality, both in Rubber and Photopolymer,  amazing punches and dies, beautiful papers and cardstock and matching Ink pads, and embellishments!.

 I love them all as you can probably tell  and I'm sure that you will once you get to play with them .  My customers love them too, as do thousands of people in numerous countries where they are available.

Stampin' Up! and Stampin' Up! demonstrators like myself  love sharing ideas and inspiration, the above idea was taken direct from my Stampin' Up! online shop, (available by clicking Shop now at top of blog, or by clicking on any links in any slider on my blog.

I also provide Stampin' Up! parties and classes  at your home for more information see my Host a party page.

I WANT YOU TO SHOP WITH ME, But why should you?

I know that I will give you great value, and great service, I know that I will appreciate the fact that you have chosen me to be your demonstrator, and soon I hope that you will know it too.

All my customers get a thank you card. If you are shopping on line and your order totals less than £150, please use this months hostess code at the top of the page,  at the end of the month I send out a little gift to that months  customers. If your total order is over £150 please do not use the hostess code as you will qualify for hostess rewards and will receive free products of your choice.

I am quite happy for any of my customers to phone or e mail me with any crafting question that they are struggling with even ones not related to Stampin' Up! if I can help you I truly will.

So thats all about me, but I would love you to tell me about you, what you would like me to post about. What you would like tips about, what techniques you would like to learn,

Stampin' Up! is really one huge crafty family, consider me your wise old aunt  you would ring your aunt to ask her how to do something, so feel free to ring me,anytime between 9am and 8pm Monday through Sat, if I'm not available leave your question and I.will get back to you a,s,a.p.

So that's it for now, thanks for sticking with me till now, catch you later!