Wednesday 6 April 2016

Pick up Pencil Flowers, Customer gift for April and Bloomin' Heart Die set

Back for Good


Its been a few months since I posted due to family circumnstances. but I am back now, and back for good, so look out for loads of developents over the next few months, I am working on video tutorial and a monthy challenge with a prize. Hopefully that will be up and running by the end of June.


So all my News


Chester Club has closed due to lack of venue, but I a looking for venues in the area to start more Clubs. My other clubs are still running. I am in a temporary craft room, so things have been very chaotic along with family issues, but everything is now running smoothly.

I have also been sharing Tutorial videos from some of my favorite Stampin' Up! demonstrators on my Facebook page for you to check out. So pop along to see what inspires me every week.


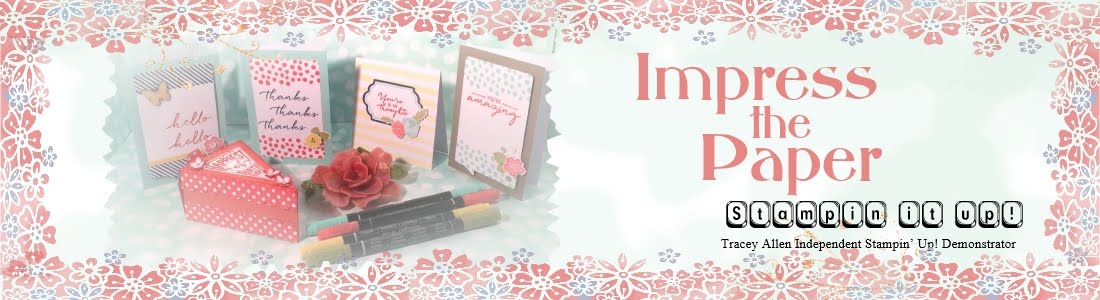
Customer gifts this month,


For any customer who orders from me this month I have these cute pick up pencils, I use mine all the time to pick up small peices of paper, like the tiny eyes in the owl punch, It makes it so easy to pick them up and place them on the adhesive, I would be lost without mine. So I am decoratig one for every customer this month, So if you purchase anything from me or come to one of my clubs this month you to will have one of these great pencils, (online purchasers must allow contact s I can post pencil to you). Paper used Bloomin' Love Dsp 6 by 6 Stack.


Bloomin Hearts Die Set


I adore the Bloomin Hearts die set and so do these two clients from the class I run for Barnies hub on a Thursday, these were two Valentines cards for their loved ones, I really enjoyed them teling me how surprisedtheir wives were to recieve a handmade Valentines. They both did a fantastic job,


Ever since I purchased the die I have been dying to use it with Plumbers Aluminium Tape and Sharpie Markers. I die cut 4 out of Cerial Box car. Plus 2 layers of flowers. Adhered them all together to create a chipboard style heart. Then adhered the flower layers. Then adhered the heart to a 4 inch Chipboard square.  I covered Square in Aluminium tape I used paper stumps to slowly stretch the foil over the designs usin smaller and smaller stumps then finished by using an ebossing tool to genty run around design to define,

Brushed over with Gold Stazon and Black stazon, left to dry then coloured with sharpies. Hope you like the effect,


You can find the Bloomin Heart bundle in the spring summer bundle Slide below.
Thats it from me for today. Catch you soon.


Monday 7 September 2015

New Craft Club in Chester and another quicky project idea

Stamp and Scrap, Craft and Chat Club (Chester) cost £5.

Looking for the perfect crafting club in Cheshire.  I think you will like this.


Wednesday's 6pm till 10.30 pm Arrive when you can, leave when you need to.
Free Pizzas available with 2 Full price drinks between 5 and 8pm

You bring your basic tool kit,  some extra card, and papers or a project you are working on.
I will bring at least 15 stamp sets, 10 die sets, 10 punches, some embossing folders, punch boards. Stamp and write markers in 50 colours, 10 stamp pads die cutting machine and over 20 years of tips tricks and knowhow.

You will also have the chance of winning a great Stampin' Up! Item every week, tickets will be 50p each or 5 for £2.

At the end of each month you will receive 1 lottery ticket for every session you attend that month and one ticket for every £10 of purchases you make that month. There will be a draw for 3 prizes. 

Complete beginners welcome, I will be there to help you with advice, demonstrations, quick lessons to help you with anything you are struggling with.?


1st club is 21st Oct there are only 30 places available each week so please book your slot to avoid disappointment by ringing 07963 45973 or e mail me at stampandscrap@mail.com
Stamp class by post,  post out date 1st October.

Today's Autumn Winter project Inspiration


Well today's project used the fantastic Woodland Embossing folder. 

You emboss a whole 6 by 6 square with the woodland embossing folder. Then you sponge the whole sheet with Chocolate Chip ink . stamp the Leaves from Among the branches stamp set' , in Cajun Craze, Always Artichoke and Cajun Craze Stamp and Wrire markers. Then Stanp the fox fromThankful Forest friends , in Cajun Craze then fussy cut right Him out, so there is no border. Punch a Whisper White  decorative lable (punch now retired but will work with similar shapes  Ink up only the Thanks from the Give Thanks greeting from forest friends set, using Cajun craze stamp and Write marker  it in the middle of the lable ,  Ink the  top leaf flourish with always artichoke stamp this top and stamp it on the bottom.? 

So that's my little card. I think it's cute and shows how you can selectivly utilise greetings, with my favourite Stamp and Write markers. 


Sunday 6 September 2015

Just wanted to share this amazing craft find

Peeps, just a quick post I have to share with you!

Get down to your local LIDL a.s.a.p and you will find these amazingly cute products that are fantastic for crafting with although they are described as decorations. The 1st 3 pics were items costinf 2 for £2. Oh I know what a huge bargin and that is why I am sharing this with you, and in all my fav crating groups,


The items below were £4.99 each
 

 Now these ones as you can see are not really for crafting, but you could use the squirrel and hedgehog If you make jewellery for temporarily holding drop earings that you making. The Wooly owls as pin cushions


and these trees are just going to decorate my new craftroom when its finished as they are so cute!. Uhm you could lean your last two card projects against the bottom, till you file them if they have to have a use. So what creative use would you put the trees too.  Looking forward to seeing your great ideas.in comments.
.
So I hope that at least some of you get your sticky mits on some of these cute bargins.
Guess what stamp set I'll be using with some of these , yep I see another Lighthearted leaves stamp set use here.

Come back on Tuesday to see what I make.

Friday 4 September 2015

So obsessed More Lighthearted leaves projects and Quick Tutorials

So I have to admit to being completly obsessed with the "Lighthearted Leaves" stamp set. You cannot help but love it. Everytime you put it down, another idea pops into your head. So here are my latest projects.

CARD

The card is embossed Copper foil. I punched the corners with the Curvy Corner trio punch. then stamped the design in Stazon, 

Then placed the foil onto Stampin' Up! piercing mat. I went over the design with a fine embossing tool and then I embossed it from the back and the front with various size embossing tools,  The copper was coloured with Sharpies. 

CANDLE
The candle uses "Blackberry Bliss",  "Melon Mambo" and "So Saffron" Ink pads and sponged onto Tissue paper. .( Be careful when sponging tissue as it is very fragile,  I placed my hand flat onto it with my thumb and index finger spread apart, and gently sponged about  1 to 2 inches from the v,)

Cut tissue  to size of candle plus tiny overlap. 

Stamp leaves along both edges. so that edge of leaf aligns with edge.  Trim along leaf edges on one side and make a gentle curve to next leaf. This will be the top. 

Using a heat tool heat a vertical line alone candle until you can see wet wax,  Position one side of tissue onto the line of wax, Then smooth the tissue around candle. Heat along same line and gently position second edge. Lie on its side on a glass mat  Then gently heat sections of the candle until you see wax on top of the tissue, roll the heated bit onto the glass mat , heat next section etc, until you have completed the whole candle.

MINI MUSLIN BAG

 First I cut a peice of card to fit inside muslin bag. This makes it easier to Stamp on the Muslin bag, Then stamped the leaves in Blackberry bliss inks then coloured with Stamp and Write Markers which come out a llot darker on Muslin

Built for Free Using: My Stampin Blog


Tatty Bye for now, Catch you later.

Wednesday 2 September 2015

I can't leave "Lighthearted leaves" alone! 1st Stamp class by post

Well, well, well.

I broke out the "Lighthearted Leaves" Stamp set today. Now I just can't put it down. There are just so many ways you can use it.  I haven't even used the matching die set yet. You can happily just stamp them in different colours or play around for hours with different techniques,

So I have decided , spend £50 with me before the 26th September and e mails me with your order number and address and you will receive completely free a Card and punched card kit and complete instructions  to make the following cards.

Lighthearted Leaves Stamp Class by post free with orders of £50 or above

Lighthearted Leaves Stamp class by Post from Stampin'  Up! Independent Demonstrator Tracey Allen Free 5 cards with orders of £50 or more

Lighthearted Leaves Stamp class by Post from Stampin'  Up! Independent Demonstrator Tracey Allen Free 5 cards with orders of £50 or more


If you order £80 or more you will receive the Bonus 2 Pillow boxes card and ribbon kit and instructions.


You know that the Autumn Winter catalogue is packed with items you want, so why not get something completly free as well.,

Plus look out for many more Lighthearted leaves projects as I am teaming with ideas.

If you want ideas for what to buy, check out all these glouriously versatile bundle offers.

Built for Free Using: My Stampin Blog

Here are all the items I used for the Cards and Pillow box, if you do not want the free kits and o just want to buy a couple of items.


Built for Free Using: My Stampin Blog


Tatty Bye for now, Catch you later.

Monday 31 August 2015

Yippeee its Autumn Winter Mini day

I have a few pictures to share before you go haring off to see the new catalogue

I have to admit I didn't think that Stampin' Up! could beat their last Mini catalogue, but how wrong was I, I think there is only 2 things I don't want in the new catalogue and to be honest  I've almost changed my mind about one of them, but it is all so lovely


I had so much fun making these beautiful Christmas tags, in the "Oh, What Fun tag kit" and love the "Oh. What fun stamp set that goes with it, So much so that I am inspired to make loads more posh tags , so look forward to seeing a whole range of tags using the Stamp Set with other Christmas papers and stamp sets.


So to the Christmas wreath I love the noise this makes , it rustles , so I am really tempted to hang it where it might get a breeze, the kit version has all green trees and is very contemporary, but as my house is Victorian I decided to use one of the trees from the Peaceful Pines stamp set as well . I think this looks more suited to my shabby victorian town house,
Oh but is it a Christmas wreath, or is it the "Season to Season Wreath" kit

Amazing how different it looks with burlap ribbon ( I must learn how to tie burlap bows,) and Autumn colours. But whats this?


I think that I had most fun playing with the halloween one. I just couldn't resist colouring some small basic rhinestones red and giving the bats eyes, and adding an extra boo sticking out from behind the banner and adding a spider dangler on Window sheet tamped in Stazon.

I have plans for the wreath, I wil be doing a few more versions of this over the coming weeks, including another Winter one and a spring and a summer one. I wuld also like to do a babys bedroom one too. So keep your eyes peeled BOO!

So you can hare off now, to see the new catalogue here  or Shop products now!


Sunday 30 August 2015

Posh Tags this Christmas

Finally had a bit of time to get one of my Pre-order kits out and have a play. The "Oh, What Fun" Christmas Tag kit and "Oh. What fun" Stamp set.

Christmas is never going to be the same, Not only did I really love making these tags, but I really want to carry on making this style of Tag, I have so many ideas buzzing around in my head that its so exciting. So keep an eye out for some really cute Christmas tag ideas in the near future.

So here is the picture


So did I do the kit exactly as instructions. No and I will give you a quick tip. Stamp the to and from on the back of all your tags before you start,

The occasional tag design was just a little to plain fro my tastes so any you see with inked edges, thats my addition. The Oh What fun tag original design had the lace just peeping out from beneath the banner.  I love that lace so much that its a bit like the film Dirty Dancing for me. Nobody hides Lacey in a corner, So I ruffled the lace and had most of it showing.

The  Merry Wishes tag The greeting and line were originally both red and the No peeking tag was stamped all in Mint Macaron, I also cut up the left over gold glitter card and added strips to the no peeking. But thats it, I didn't use any other Stamps or items not already recomended by the kit,

I love these so much that I am definatly going to be doing some of my own, versions with other Stampin' Up! stamp sets and have loads of ideas already.

So peeps thats todays short and sweet post,

Catch ya laters.
Tracey